
This DIY Glitter House is the perfect way to glam up your home this holiday season and can be customized to match your other decor. Make one or create a whole village to add a warm and cozy feel to the house!
When I was growing up, every year around Christmastime, my brothers and I would make our own gingerbread house. I remember we spent hours putting it together, making sure that we used every candy wisely when decorating our little house.
After all the hard work we put into the house, I never had a desire to eat it afterwards. For one, I don’t really care for gingerbread all that much, and number two, how could I just go ahead and eat this masterpiece that we just created? So usually my dad was stuck eating it.
I wanted to keep up with my tradition of designing a little festive house, but now that I’m no longer living at home with my parents, I knew a gingerbread house wouldn’t be the best option because no one would eat it, so really, what’s the point??
So this year, I decided to instead make a DIY Glitter House.
Gingerbread may not be my cup of tea but pastel and glitter definitely are…if you haven’t noticed.
I have actually been wanting to buy one of these glitter houses already made for quite some time now but couldn’t justify the price. They’re definitely not cheap. So I did a little research and learned that I could create one of these little houses myself. Count me in!
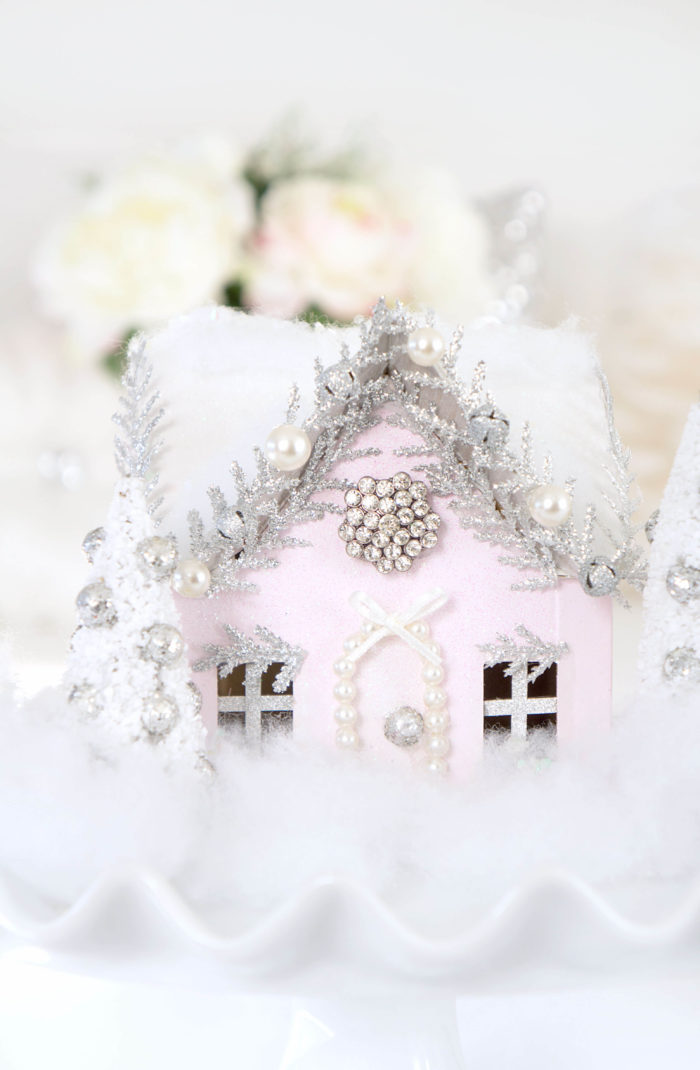
The best part is, by making your own DIY glitter house, you can customize the colours and design of the house. Of course, I went with blush, because is there really anything better than a pastel pink house? I think not.
So the first step in making one of these cute little glitter houses was deciding whether to buy a house already made or assemble it myself. Questions, questions.
I went with the latter option when I found this pack of houses for a good price. I thought, this way, I can work on one a year and it could become a fun little holiday tradition.
I had a bit of a vision of what I wanted to do with the house before I got started, but decided to just go with the flow and add little decorative touches as I went.
That’s all part of the fun…just letting the creative juices flow!
So here are the supplies I ended up using for this little project. Feel free to customize and make it your own!
Table of Contents
How to Make a DIY Glitter House
Supplies Required:
- Houses to decorate (I used houses similar to these)
- Paint colours of choice (I used Martha Stewart ‘Ballet Slipper’ acrylic craft paint for the house and Martha Stewart ‘Mother of Pearl’ acrylic craft paint for the roof, chimney, door and around the windows)
- Paint brushes of different sizes
- Clear Glue
- Hot Glue Gun
- Polyfil for snow
- Extra fine white glitter and chunky white glitter (for snow)
- Bristle brush trees
Decorative accessories
- Mini ornaments or silver sparkly balls
- Silver Sparkly garland
- Bow
- Pearls
- Decorative Rhinestone
- Silver sparkly scrapbooking paper
- Fake tea light
Instructions:
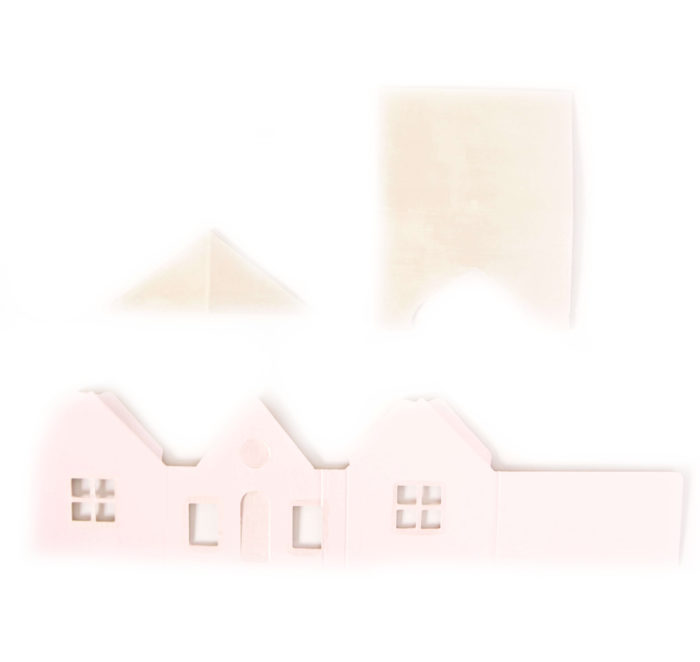
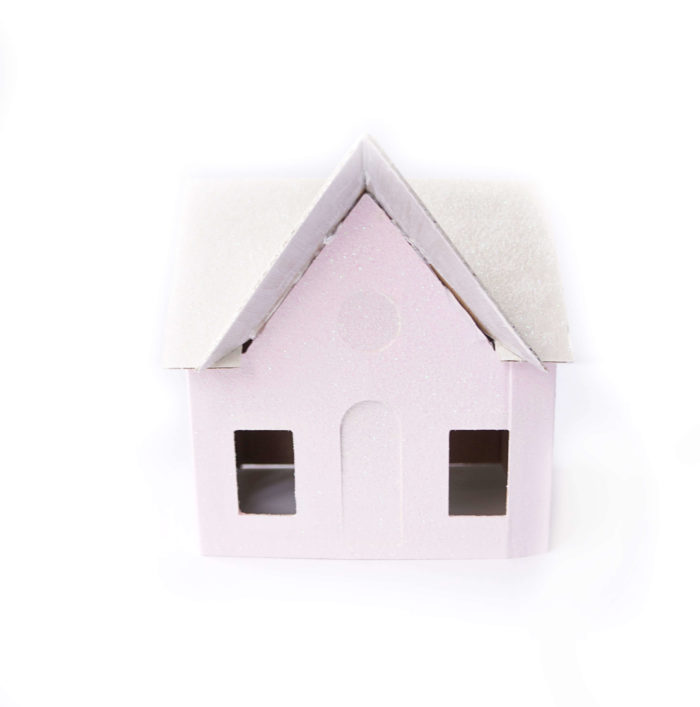
Paint the house and roof in desired colours. I used blush pink for the house and a pearl white for the roof (see specific paint used above). Because my house came unassembled, I decided to paint it before assembling it as I figured it would be easier than painting it once it was all put together.
Wait for the paint to dry. Apply another coat of paint if necessary.
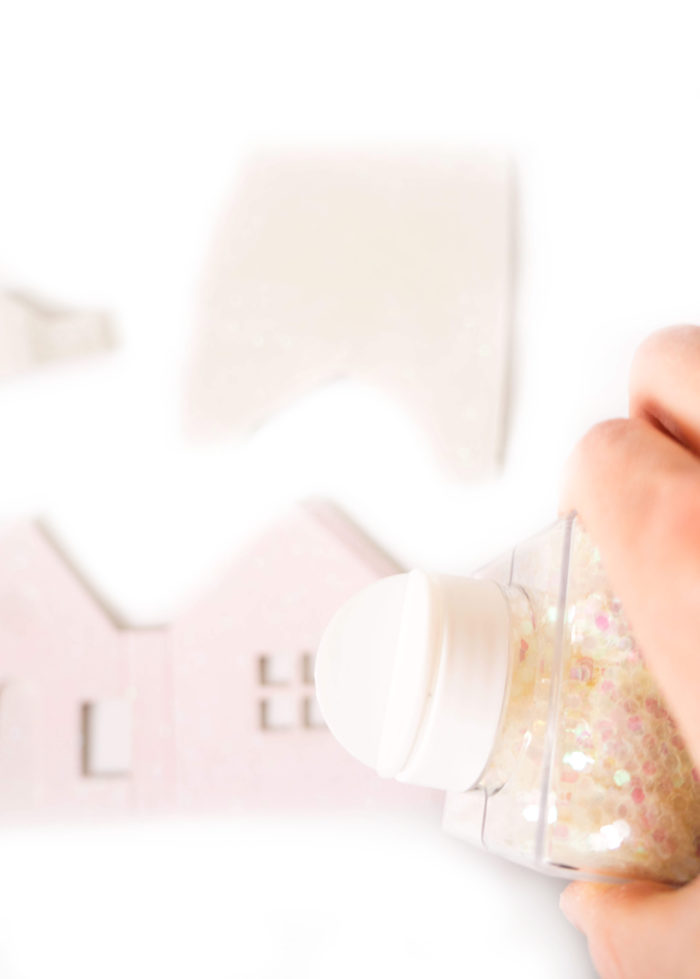
Once the paint is dry, using a paint brush, apply a thin layer of glue all over the house (or wherever you want the glitter). Sprinkle the glitter onto the house and shift it until the glitter is dispersed evenly over the house. Repeat for the roof.
I like to apply the glitter over a large piece of paper so that I can simply pick up the paper and dump the remaining glitter back into the container. That way it doesn’t go to waste!
Using a glue gun, glue pieces of house together according to the instructions. Skip this step if the house is already pre-assembled.
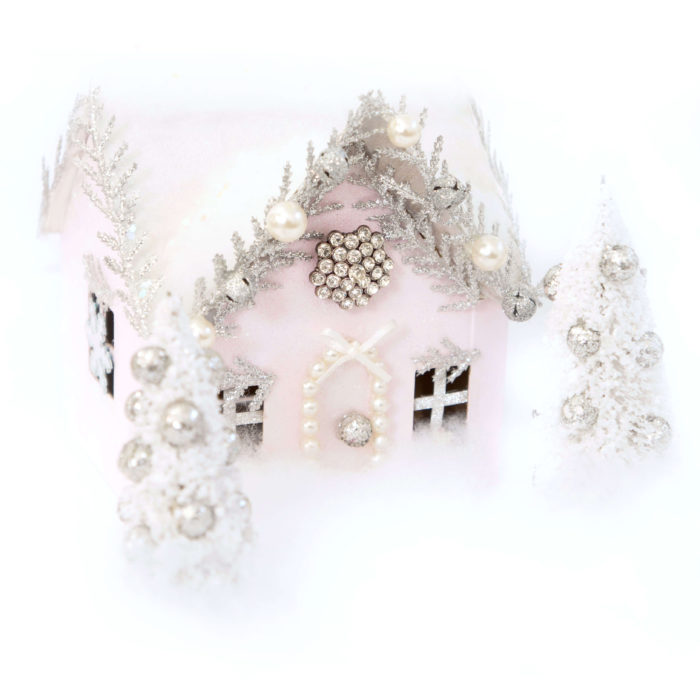
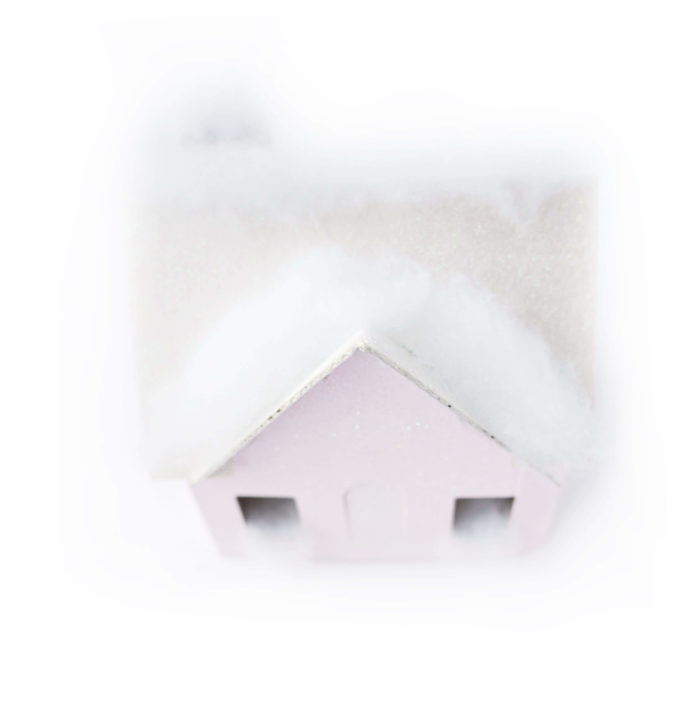
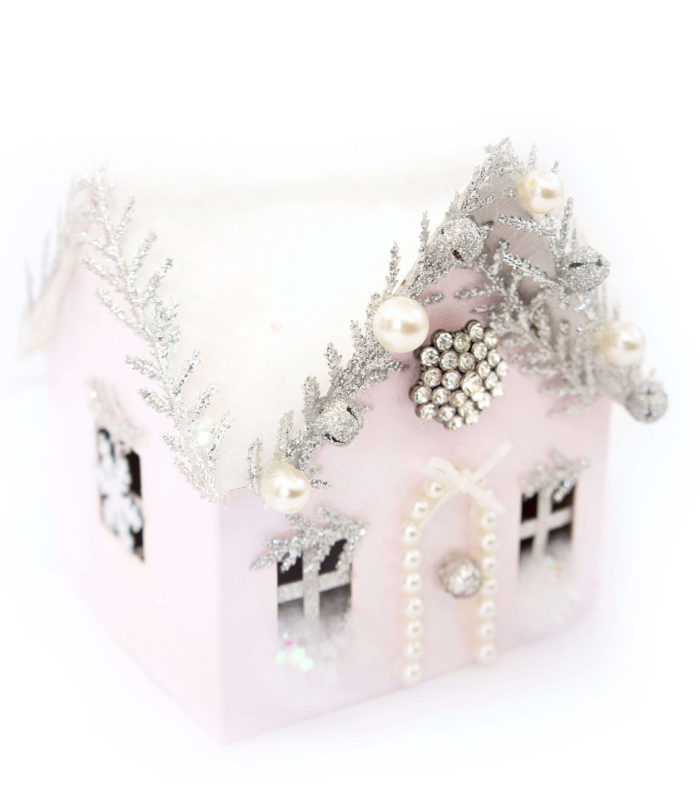
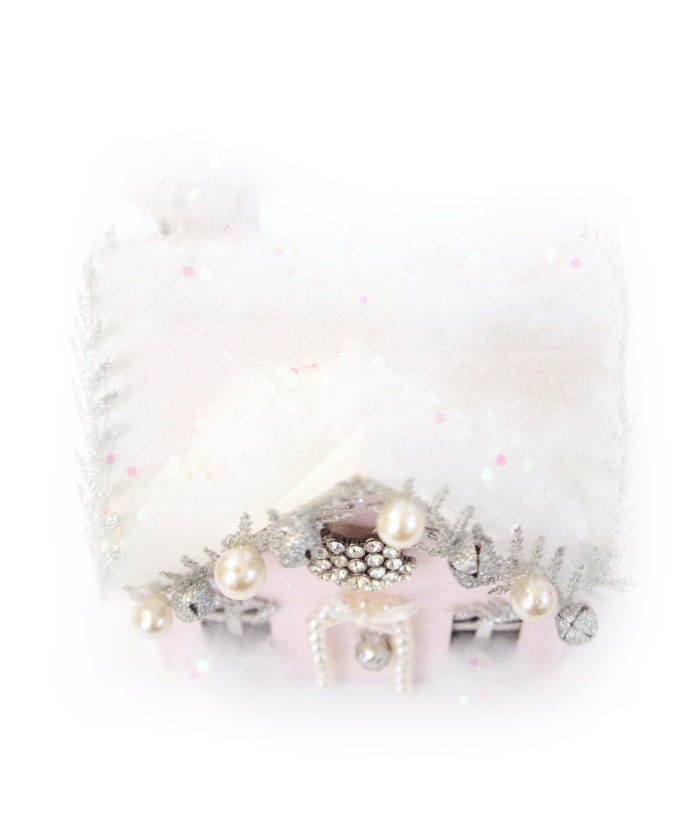
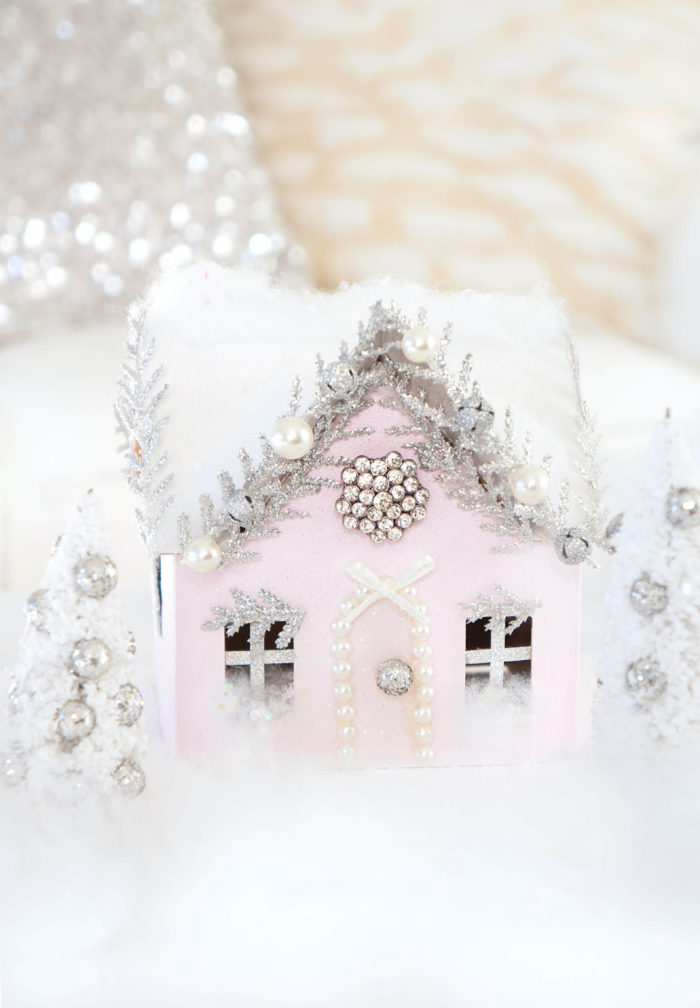
Once the house is assembled, using the glue gun, glue the polyfil on wherever you’d like the house to have the appearance of snow. I did the top of the roof, on top of the chimney, the window sills, and peak of the smaller roof to cover up the cracks on the roof where the cardboard pieces were glued together.
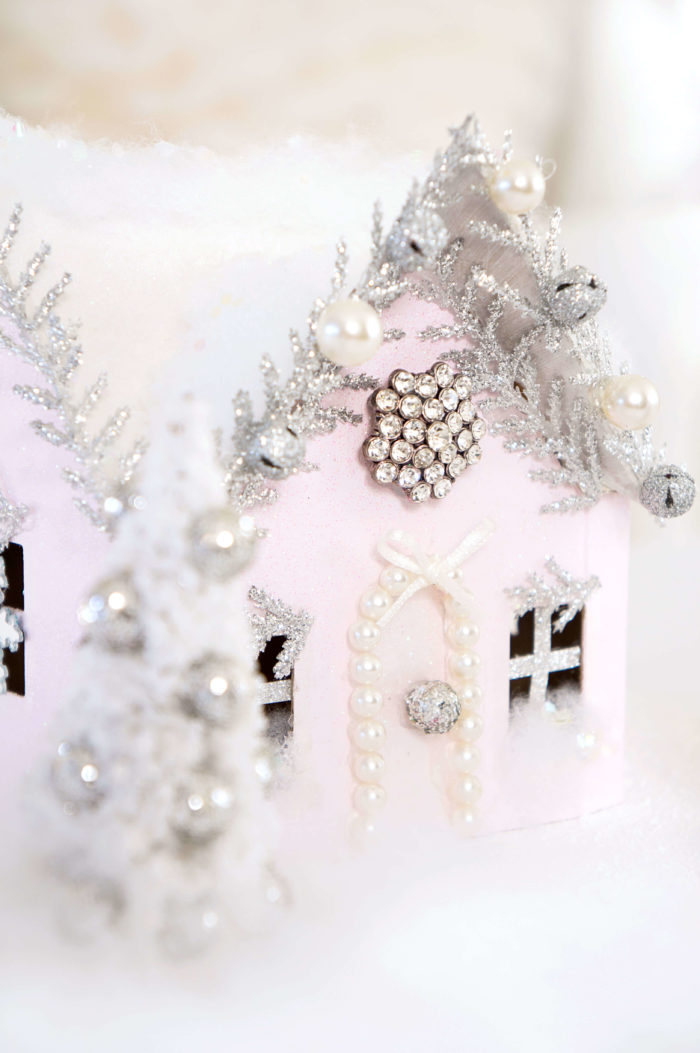
Decorate with whatever accessories you choose! I cut up pieces of sparkly garland and lined the edge of the roof with it. Next, I used pearls from an old pearl necklace and glued them around the door frame and as ornaments on the roof.
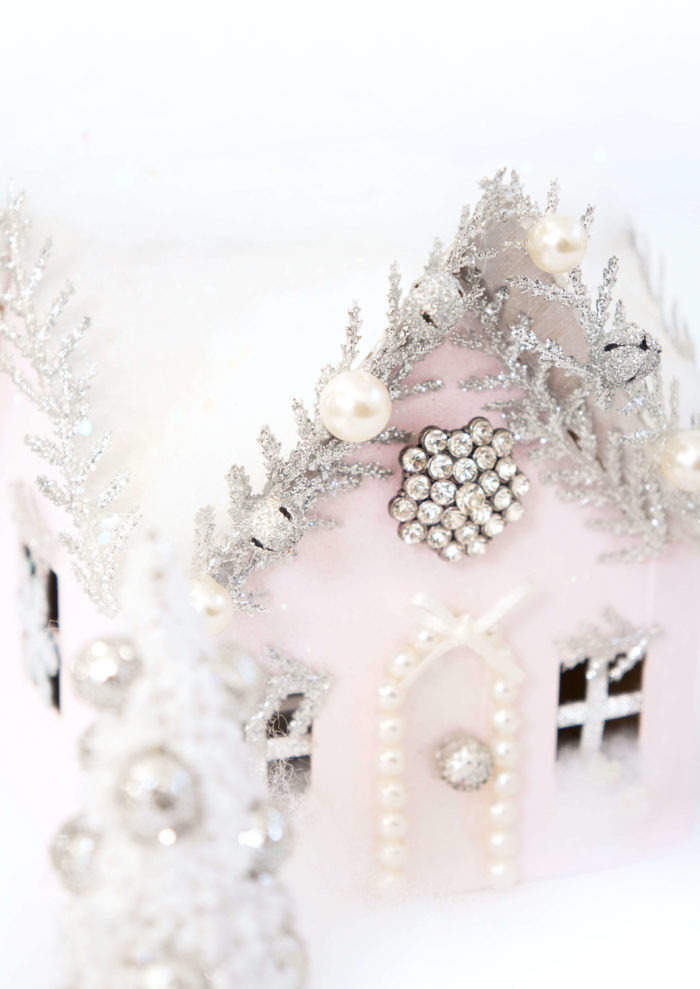
I also glued a little bow and large decorative rhinestone above the door. I found some mirrored snowflakes at the dollar store and glued them to the windows on the side of the house.
Also, the windows on the front of the house didn’t have window panes and I wanted to add some to give it more of a cute cottage look, so I cut thin strips of silver sparkly scrapbooking paper and glued them criss-crossed to the window to resemble a window pane.
Next, I squirt a bit of clear glue on top of the snow and sprinkled some larger white glitter on top to give the appearance of glittering snow.
The next part is totally optional, but highly recommended as it sets the scene for your little glitter house. I purchased some decorative white bristle brush trees and took a fake decorative twig with silver sparkly little balls on it and cut those off and applied them to the trees. Or you can glue mini sparkly ornaments to the trees too, if you can find them. Just gotta get creative!
Either leave the house and trees as they are and place them on a table or tray, OR alternatively, you can glue them to a base if you want them attached to something. I chose NOT to glue mine down so that I could place a fake tea light underneath and light the house up at night to give off a nice warm glow!
Let’s just say that if Haute & Healthy Living had a headquarters, THIS would be it.
Anyone who loves glitter and bling, needs one of these DIY glitter houses in their life.
What colour would you paint house…and how would you decorate it? I would love to hear your ideas!
More DIY projects
- DIY Ornament Wreath
- DIY Wooden Crate Shelf
- DIY Decorative Tin Can Vases
- DIY Inspirational Cork Board
- DIY Mason Storage Jars
This post may contain affiliate links which means that I may make a small commission at no extra cost to you. I only promote products that I love and feel will benefit my readers :)


Oh my goodness, I absolutely love this craft. I had planned to get houses from the thrift stores and paint them. I love the cardboard houses since I get so much cardboard from the packages. These are so adorable. Here I go craft my stash! Beautiful, thank you
Thanks so much Terry! These houses are so much fun to make because you can totally customize them based on your style! The set I purchased had 12 cardboard houses so lots of room to be creative with all the different options! Hope you enjoy this fun little project :)
Where do you get the pre made little houses?
I purchased mine on Amazon. The ones that I bought can be found at the link below. It came as a set of 12 so I hope to make a few every year to create a village! You do have to assemble the houses yourself, but they’re pretty easy to put together.
https://amzn.to/2YsQfgo